Finding the best spot to attach the camera
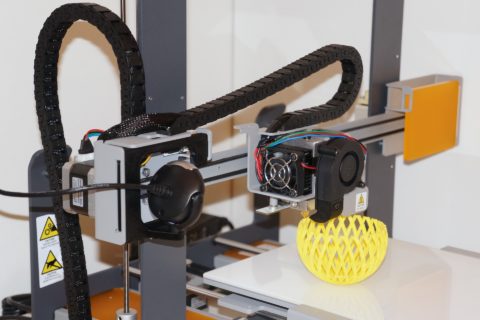
Since the Hephestos 2 has a moving print bed and an arm that moves in the Z axis, I thought the best way to add a cam was to let it move in the Z direction with the extruder arm, pointing in the direction of the red arrow. In this configuration the extruder is always visible, even if large objects are printed.
The BQ Hephestos 2 printer. The camera will replace the yellow cover on the left side (see red arrow).
Recycling a cheap USB webcam
I already had a USB webcam that I wanted to use, a Somikon SXGA with a resolution of 1280×1024 pixels. It features its own light source (6 white LEDs) and a manual focus control. It can be rotated and tilted, and the stand can be removed by unfastening a screw.

The Somikon SXGA USB webcam.
Designing the camera mount
To attach the camera to the arm of the Hephestos 2 I designed a custom camera mount that would replace the yellow cover (see red arrow in the first image above).
At first I used 123D Design (a free-of-charge but closed-source 3D creation and editing tool from Autodesk). It’s easy to use, but very limited even for such a simple task. After a lot of frustration (objects wouldn’t line up correctly, chamfers and fillets can’t be changed or deleted etc.) I gave up and googled for a better alternative.
I quickly found numerous recommendations for OpenSCAD, a free software for creating 3D CAD objects using textual description. That’s exactly what I was looking for, being a programmer.
After reading this great tutorial and this cheat sheet I was confident enough to try it out. So I installed OpenSCAD on my mac and created the model for my camera mount in less than an hour. It’s about 20 lines of source code.
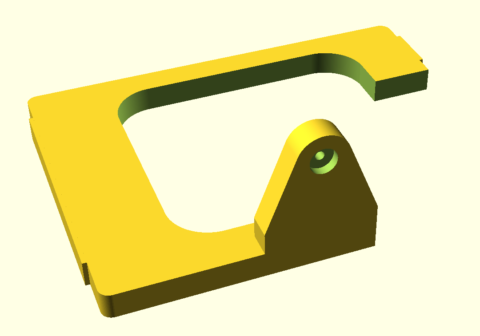
The camera mount was created in OpenSCAD by combining/subtracting cubes and cylinders programmatically.
The camera mount was created in OpenSCAD by combining/subtracting cubes and cylinders programmatically.
Printing the mount
Printing took around 90 minutes, I used black PLA, 50% infill and standard resolution.
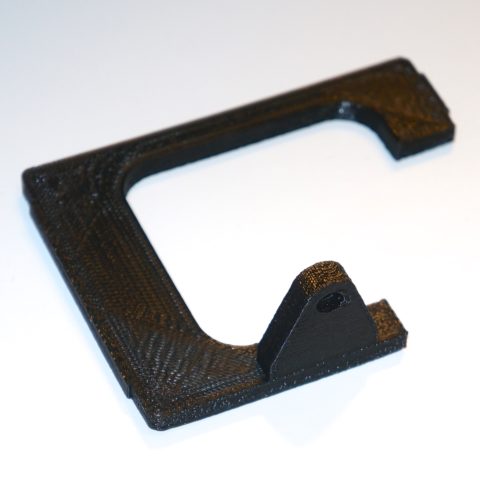
The camera mount, printed on the BQ Hephestos 2.
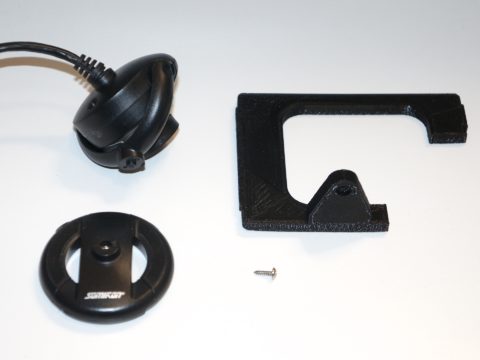
After removing the original stand, the camera is ready to be connected to the new 3D-printed mount.

Attaching the camera to the 3D-printed mount
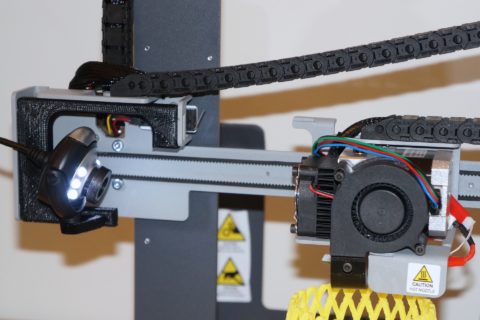
The camera in action, with the built-in leds turned on.
Since the camera slides up along with the extruder, the extruder is always visible.
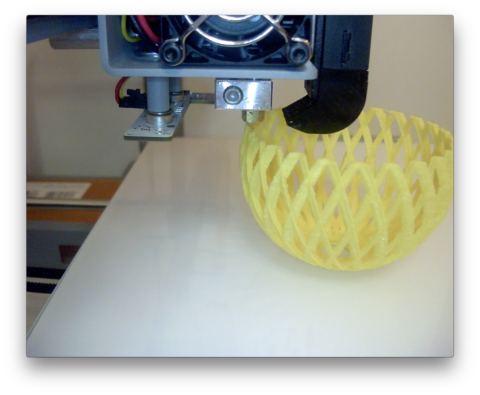
The final result: an image taken by the Somikon cam

Leave a Reply